
People ask me all the time how hard it is to incorporate milling into their baking routines. I look at it as the time added to the prepping when I get ready to bake. It will add maybe 15 mins if you don’t have it bolted down. That time is probably going to be measuring your wheat berries or other grains to be ground and grinding. (Unless you’re baking for a platoon. Then you’ll need to grind A LOT of flour. (c; )
When setting for for the days I mill flour I have the same basic prep set up every time I mill. It’s super simple.
1. Mount your mill with the clamp on to a sturdy counter or table top. If you bolted yours down, Yay! One less step for you!
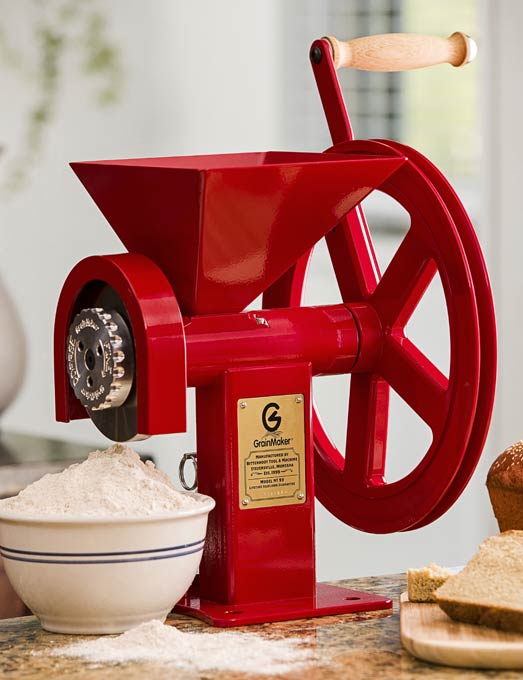 2. Check your burrs. Make sure they are clean and dry. If there’s flour left from last time, no biggie. Little oxidized? Run some hard wheat through and voila! Clean.
3. Know how much flour you’ll need.
I have meals/recipes planned out, in an air-tight container that will hold 1-2 days of flour. I don’t mill more than that. The container goes into the fridge with the flour I do not use that first day. Measure out the amount of wheat berries you will need. When ground, 1 cup of wheat berries will produce about 1.5 cups of flour. Keep the 1:1.5 ratio in mind when measuring your wheat berries out for grinding. When I’m feeling overly ambitious, I premeasure wheat berries into ziploc bags for quick access to the right amount for a couple loaves of bread or a batch of fresh pasta. I keep them in the pantry with my other dried goods, such as the store-bought pasta and rice.
Once you’ve gone through those steps, mill away! 70 rpms will yield about a cup a minute with our Model No. 99. It’s that simple. It’s not a huge process to integrate fresh flour into your baking routine.


